Shopify
This guide describes how to integrate Koalafi's financing solution to your Shopify store. It covers
the following topics:
- Considerations Before You Begin
- Credential Generation
- Installation
- Adding Promotional Widgets
- Product Configurations
- Post-order transactions
- Troubleshooting
Considerations Before You Begin
-
Payment capture setting
You will need make sure your your payment processing type is set to “Automatically when order is fulfilled”. This captures payment and activates the lease at the time of shipping instead of at successful checkout. Note that when you change this setting, it will change the payment capture for all of your payment types
For details, see Shopify's guideWhy this matters: Capturing at fulfillment keeps the lease aligned with shipment.
-
Product SKUs
Our plugin uses SKU to capture product details such as price needed for financing. Ensure all products have a valid SKU populated before installation.
You can confirm that a product has a SKU by going to the Products page and filtering for items with missing SKUs.
Best practices:
- Use unique SKUs per variant (size, color, etc.).
- Avoid special characters that can cause CSV or integration issues (stick to letters, numbers, dashes, underscores).
Why this matters: Missing or duplicate SKUs can prevent financing offers from displaying.
How Koalafi Sales Tax Works in Shopify
When a customer pays with Koalafi, you are not responsible for remitting the sales tax. Koalafi collects and remits the tax on those purchases.
However, Shopify still shows a sales tax amount in your order records because Shopify does not automatically remove the tax line for Koalafi orders.
What this means for you:
- In your Shopify reports, you may see sales tax listed on Koalafi orders.
- You’ll need to manually reconcile these orders to make sure you don’t accidentally remit tax that Koalafi already paid.
- Koalafi will fund you for the purchase amount excluding sales tax, since you don’t owe that tax.
Credential Generation
We need the following details in order to begin API key generation. Please reach out to your Koalafi contact with the information listed below.
Required information
- Your Shopify URL
- A PNG of your company logo
Turn around time for API credentials: ~5 business days after you provide your Shopify URL & company logo you can expect to receive a follow up email with credentials required for installation.
Installation
-
Navigate to the Koalafi App in the Shopify app store
-
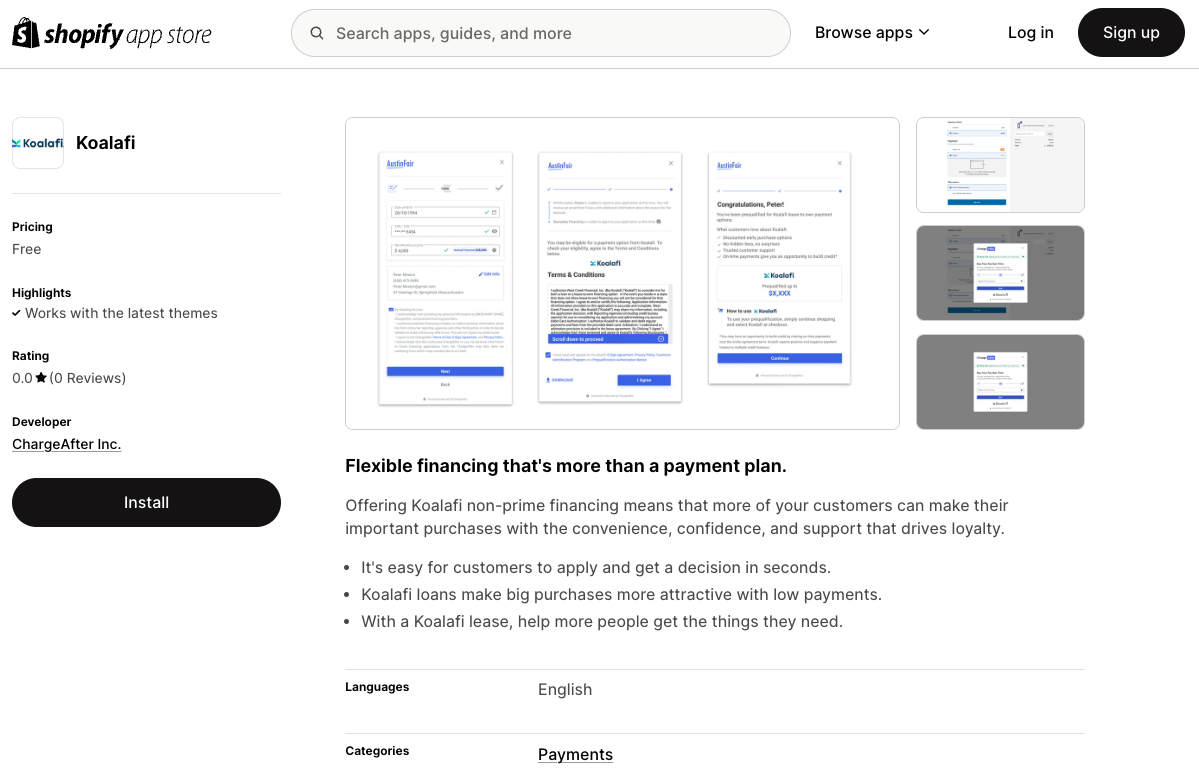
Click the "Install" button and login to your store. You will be redirected to the installation page (below):
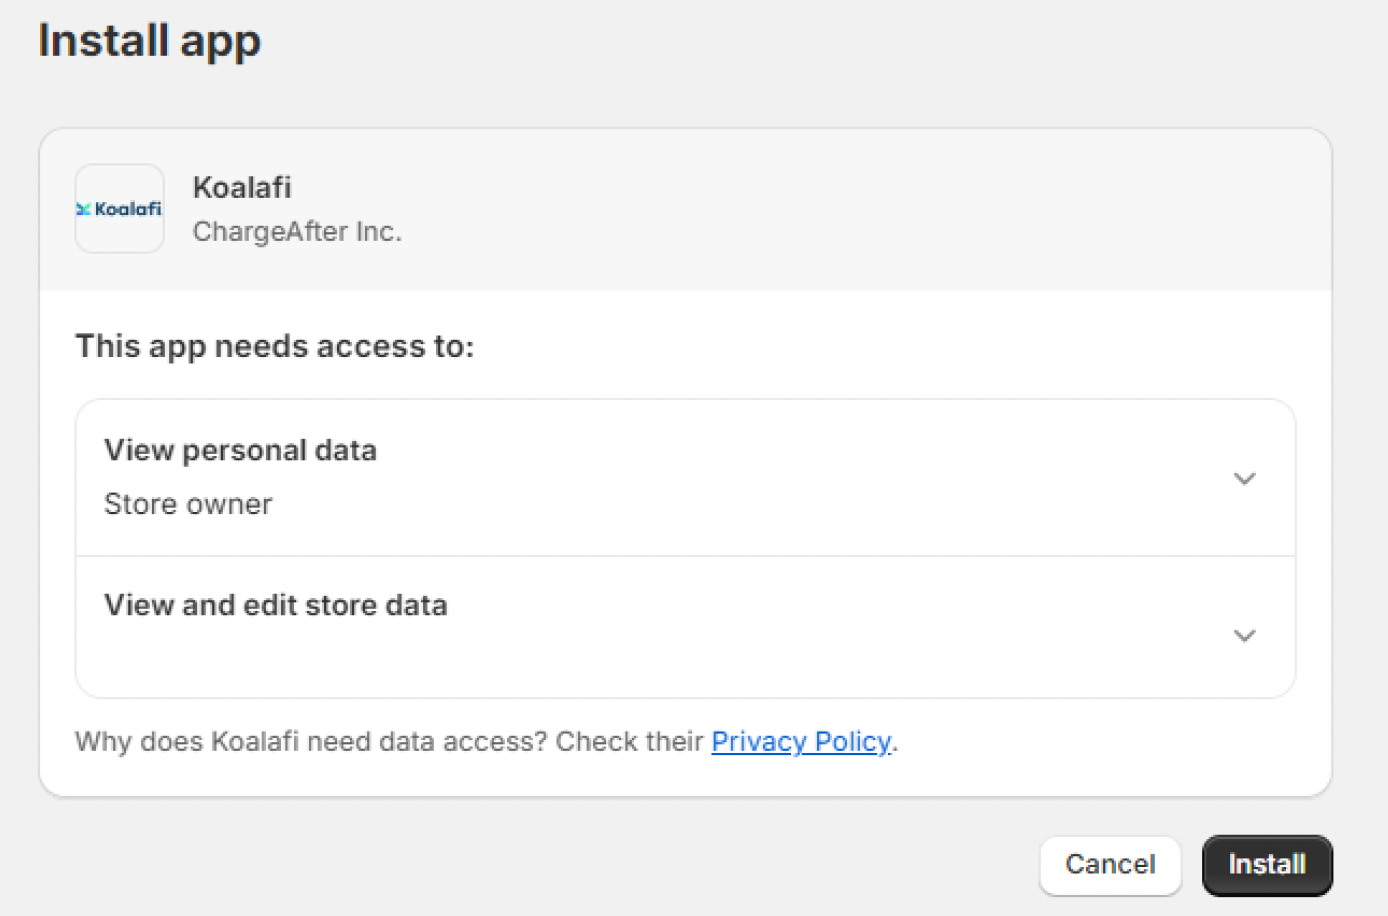
- After installation, you will be redirected to the payment gateway settings page. This screen can be found at: Settings > Payments > Additional payment methods > Payment Method by Koalafi.
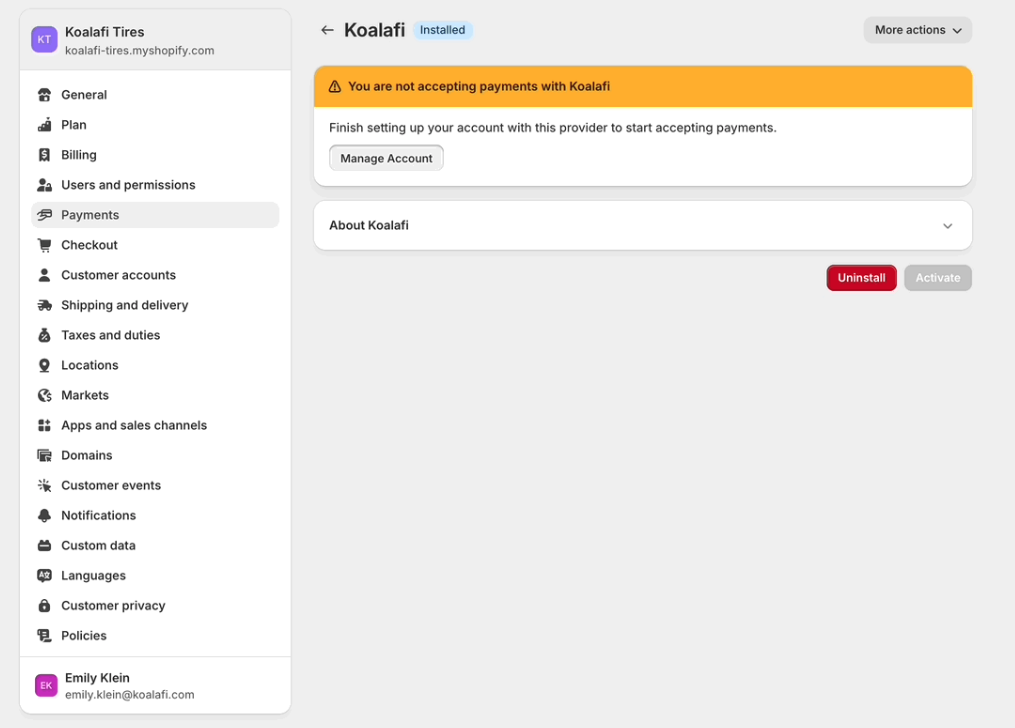
- Click on Manage Account under 'Finish setting up your account with this provider to start accepting payments.'
- Uncheck "Enable Sandbox Mode" to enable input boxes for production keys
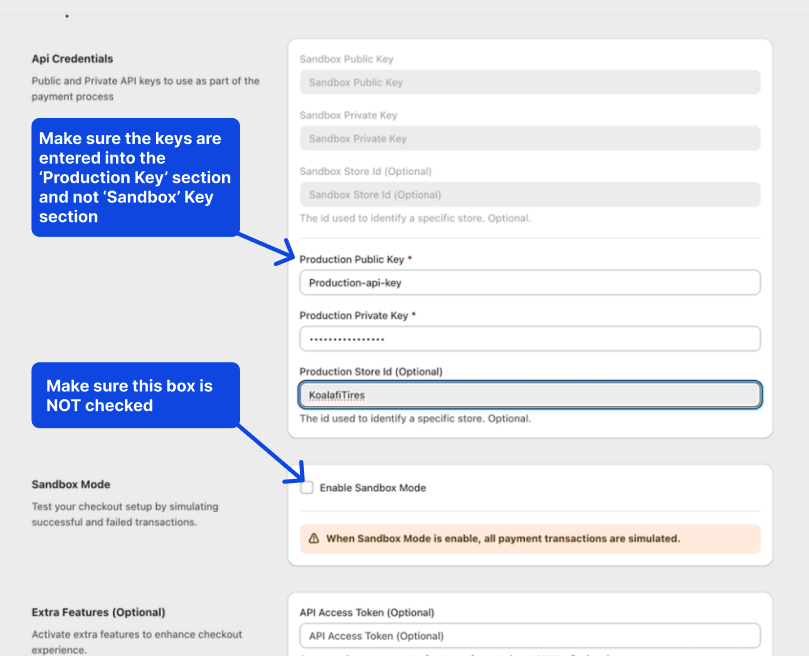
-
Enter the Production Public Key and Production Private Key in the Production fields in the "Api credentials" section.
-
Save changes.
-
You will be redirected to the Payment Methods screen.
-
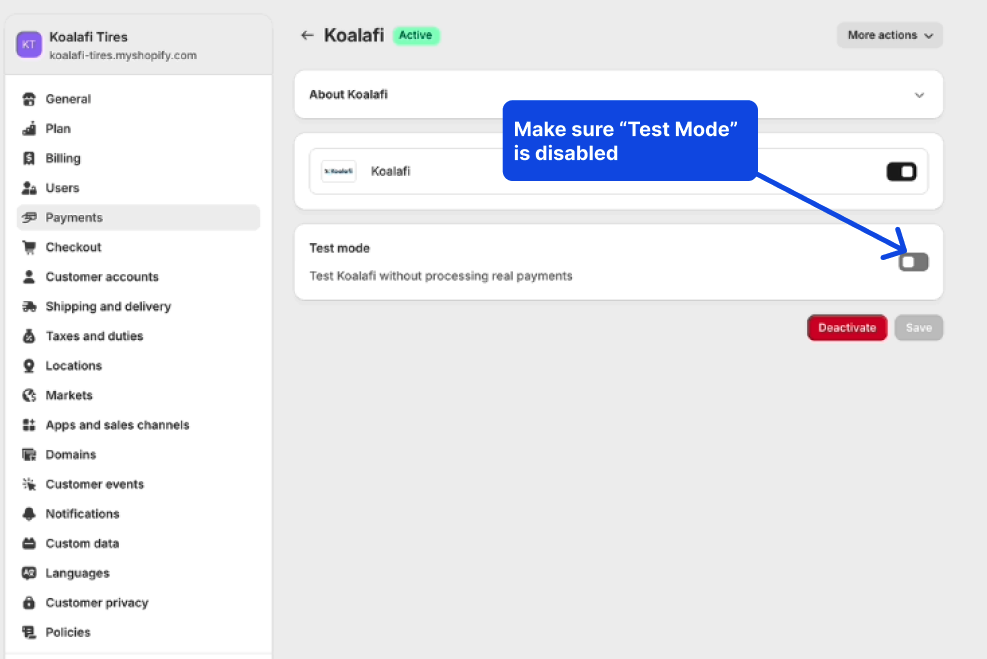
Ensure that 'Test mode' is disabled since you are turning on Koalafi in production. Click Activate Sandbox/Test Mode.
Ensure that both sandbox is unchecked and test mode is disabled since you are installing Koalafi in your production environments.
- Congrats! The Koalafi plugin is now successfully installed on your site!
Adding Promotional Widgets
Promotional widgets help ensure that your customers are aware that your store has financing options available. These promotional widgets are often displayed on your product pages next to the price and on a dedicated financing page that provides more information about the financing options you offer.
Product Page Widgets
Widgets can be added to product pages to inform customers that financing with Koalafi is an option. They are a great way for customers to learn more about Koalafi without even having to leave the product page.
The Product Page Widget has the following 2 features:
- If a customer clicks Learn More they can learn more about Koalafi
- If a customer clicks Prequalify Now they can choose to get prequalified right on the product page and learn if they have a prequalified amount with Koalafi. Then they can continue shopping and adding items to their cart and look up their prequalified application at Checkout to complete their purchase and pay with Koalafi.
Adding Koalafi Widget to the Product Page
Add Promotional Widgets using Theme Online 2.0
You must use Theme Online 2.0: https://shopify.dev/themes/os20
Shopify Online Store 2.0Note this requires Online Store 2.0 for installation. If your site is unable to upgrade to this version, see manual instructions below.
From your Shopify Admin Site click Online Store, follow the below steps:
- Navigate to the Online Store > Themes > Customize
- On the Customize page in the Home page drop-down list, select the Products or Cart page template:
- In the workspace, hover over the price and click the small plus (+) icon (or click on Add block on left sidebar)
- Add Promotional block from the app list
- Move this widget to where you'd like it to appear under the product.
- Click on the Promotional Block you just created to open the settings on the right hand side of the page.
- Choose Promotional Type as Default Template
- Click Select on the Financing Page option to link your financing page to the widget.
- Save and publish the theme.
Manual Installation
ConfigureYou must configure your theme before adding a widget manually.
From your Shopify Admin Site click Online Store, follow the below steps:
- Click Themes to go to the Themes page.
- On the Themes page, find the theme where you want to add Koalafi promotional tools.
- Next to the theme name, click Actions > Edit code. The code editor page opens.
- Scroll up to the Layout folder and open your theme layout file, which by default is
theme.liquid. - Insert the following line of code above the closing head tag
</body>:
<script src="{{ 'https://sh.chargeafter.com/1f8616d5edae1b8e4d52cc8b32a0875a
/promo/widget.min.js?shop=' | append: shop.permanent_domain }}" async></script>
Installation of Widget
- On the Themes page, find the theme to which you want to add Koalafi promotional tools.
- Next to the theme name, click Actions > Edit code. The code editor page opens.
- From the Code Editor directory, open the Template file for your product or cart page content.
For sectioned themes, this file will be located under the Sections folder. For non-sectioned
themes, it will be located under the Templates folder. - Insert the following HTML code wherever you want to display Koalafi promotional widget:
Widget for product page:
<div class="ca-promotional-widget" data-widget-type="default-template" datawidget-item-sku="{{ product.selected_or_first_available_variant.sku }}" datawidget-item-price="{{ product.selected_or_first_available_variant.price |
money_without_currency | remove: ',' }}" data-widget-financing-pageurl="financing-page"> </div>
Tip for Success!Adding promotional tools involves making changes to your store’s Theme code. The steps outlined in the next subsections need to be repeated for each theme where you want the promotional tools to be included.
Finance Page - Prequalify Now Buttons
This promotional widget is a button that can be displayed on your financing page. This button will allow customers to enter the application flow and receive a prequalification amount they can later use at checkout.

Adding Prequalify Buttons
The Koalafi Prequalify button is intended to be displayed on a Financing Page allowing the customer to apply first before they get to the checkout flow. Follow these steps to add the Koalafi Prequalify button.
- On the Themes page, find the theme where your financing page exists.
- Next to the theme name, click Actions > Edit code. The code editor page opens.
- On your Financing Page (must be within Shopify site) create a button that says "Prequalify Now" and give it a unique id. An example Apply Now button is shown in the HTML code below.
You can have as many Prequalify Now buttons as you like, but give them all unique ids!
<div class="apply-button-container">
   //This button and all subsequent  should have a unique ids
   <button id="koalafi-apply-button" class="apply-now-button">PREQUALIFY NOW</button>
</div>- Create an event listener to listen for clicks of your buttons. Within this event listener, you will call ChargeAfter.apply.present() function. See example code below.
  //Remember to replace this id with the id you chose for your button
  document.getElementById('koalafi-apply-button').addEventListener('click', () => {
      ChargeAfter.apply.present();
   })
Your financing page might be a json named something like page.financing.json in which case you either need to add a custom section for the button or add a custom liquid block on the Financing page.
Add a Custom Section for the Financing Button
Prerequisites:
- A published or draft Online Store 2.0 theme.
- The Koalafi / ChargeAfter SDK loaded on pages where the button appears (via app embed or theme layout/snippet).
-
Locate your Financing page template
In templates/ look for the JSON file that backs your Financing page, e.g. page.financing.json.
If you haven’t made a template yet, you can create a new page template in the Theme Editor and assign it to your “Financing” page under Online Store → Pages.
-
Create a reusable section with the button: In sections/ click Add a new section → name it koalafi-prequalify.liquid. Paste the code below and save the section.
-
Add the section to your JSON template
<div class="apply-button-container">
  <button
    {% if section.settings.button_id != blank %} id="{{ section.settings.button_id }}"{% endif %}
    class="button button--primary apply-now-button"
    type="button"
    data-koalafi-apply
  >
    {{ section.settings.button_text }}
  </button>
</div>

<script>
  (function () {
    // Safely attach once DOM is interactive
    function presentPrequal() {
      // Support both SDK shapes:
      if (window.ChargeAfter && ChargeAfter.payments && typeof ChargeAfter.payments.present === 'function') {
        ChargeAfter.payments.present('apply');
        return true;
      }
      if (window.ChargeAfter && ChargeAfter.apply && typeof ChargeAfter.apply.present === 'function') {
        ChargeAfter.apply.present();
        return true;
      }
      console.warn('Koalafi/ChargeAfter SDK not ready yet.');
      return false;
    }

    document.addEventListener('click', function (e) {
      const btn = e.target.closest('[data-koalafi-apply]');
      if (!btn) return;
      e.preventDefault();
      presentPrequal();
    });
  })();
</script>

{% schema %}
{
  "name": "Koalafi Prequalify Button",
  "settings": [
    { "type": "text", "id": "button_text", "label": "Button text", "default": "PREQUALIFY NOW" },
    { "type": "text", "id": "button_id", "label": "Unique button id (optional)" }
  ],
  "blocks": [],
  "presets": [{ "name": "Koalafi Prequalify Button" }]
}
{% endschema %}
Note: You can add multiple buttons to a page by adding multiple instances of this section, or by duplicating the
<button>element and giving each an id if you want unique anchors. -
Add the section to your JSON template by going to Online Store > Themes > Customize > Select your Financing page → Add section → “Koalafi Prequalify Button
-
Or if you have an existing section you want to add the button to, you can add a block definition to the section's schema (e.g., sections/image-with-text.liquid).
Example block definition:{% schema %} { "name": "Image with text", "blocks": [ { "type": "koalafi-prequalify", "name": "Koalafi Prequalify", "settings": [ { "type": "text", "id": "button_text", "label": "Button text", "default": "PREQUALIFY NOW" } ] } ], "presets": [...] } {% endschema %}
Product Configuration
Tagging a Product as Non-Leasable
Specifying whether a product is leasable is required when offering a lease-to-own financing option with Koalafi. Non-leasable products generally include weapons and non-physical goods such as gift cards, service fees, warranties or installation fees. The Koalafi app treats all products as leasable by default, so you'll need to update any product that falls into the non-leasable category.
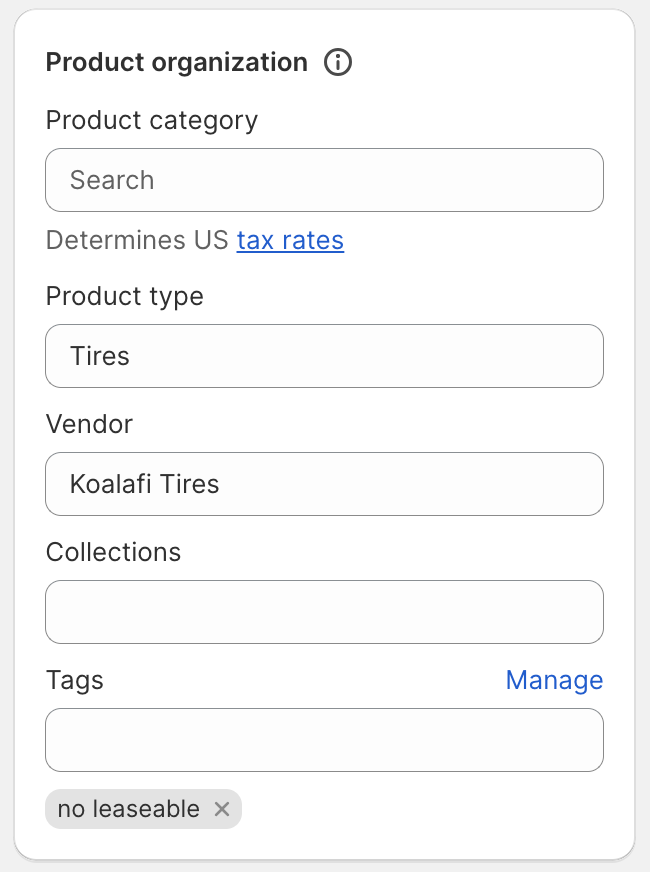
Follow these steps to tag a product as non-leasable:
- From the admin site go to the product details page.
- In the Organization section, under Tags, enter the words “no leasable” and press Enter.
The product should now be tagged as "no leasable", as shown below:
Giving a product a SKU
All products are required to have a SKU for the Koalafi App to work correctly.
Follow these steps to add a SKU to a product:
- From the admin site go to the product details page.
- In the Inventory section you will see an input for SKU. Add a SKU to this field.
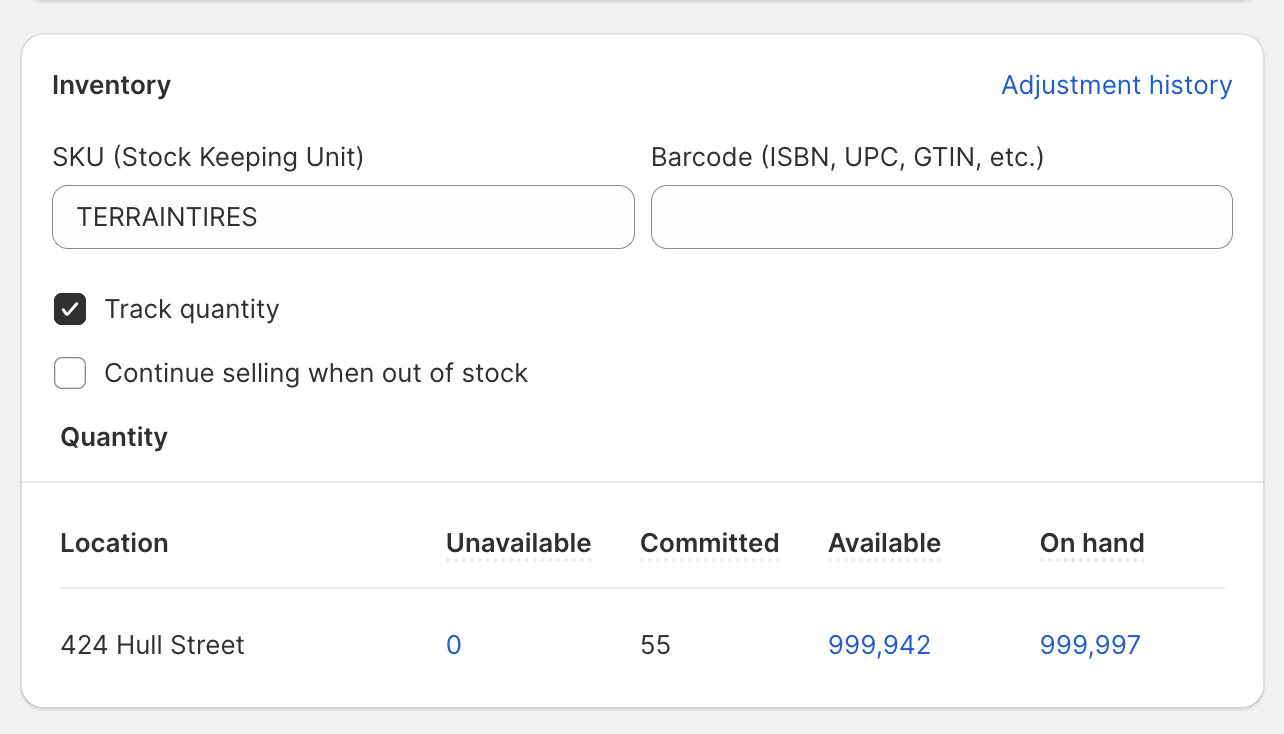
- Repeat for all products in e-commerce store.
Post Order Operations
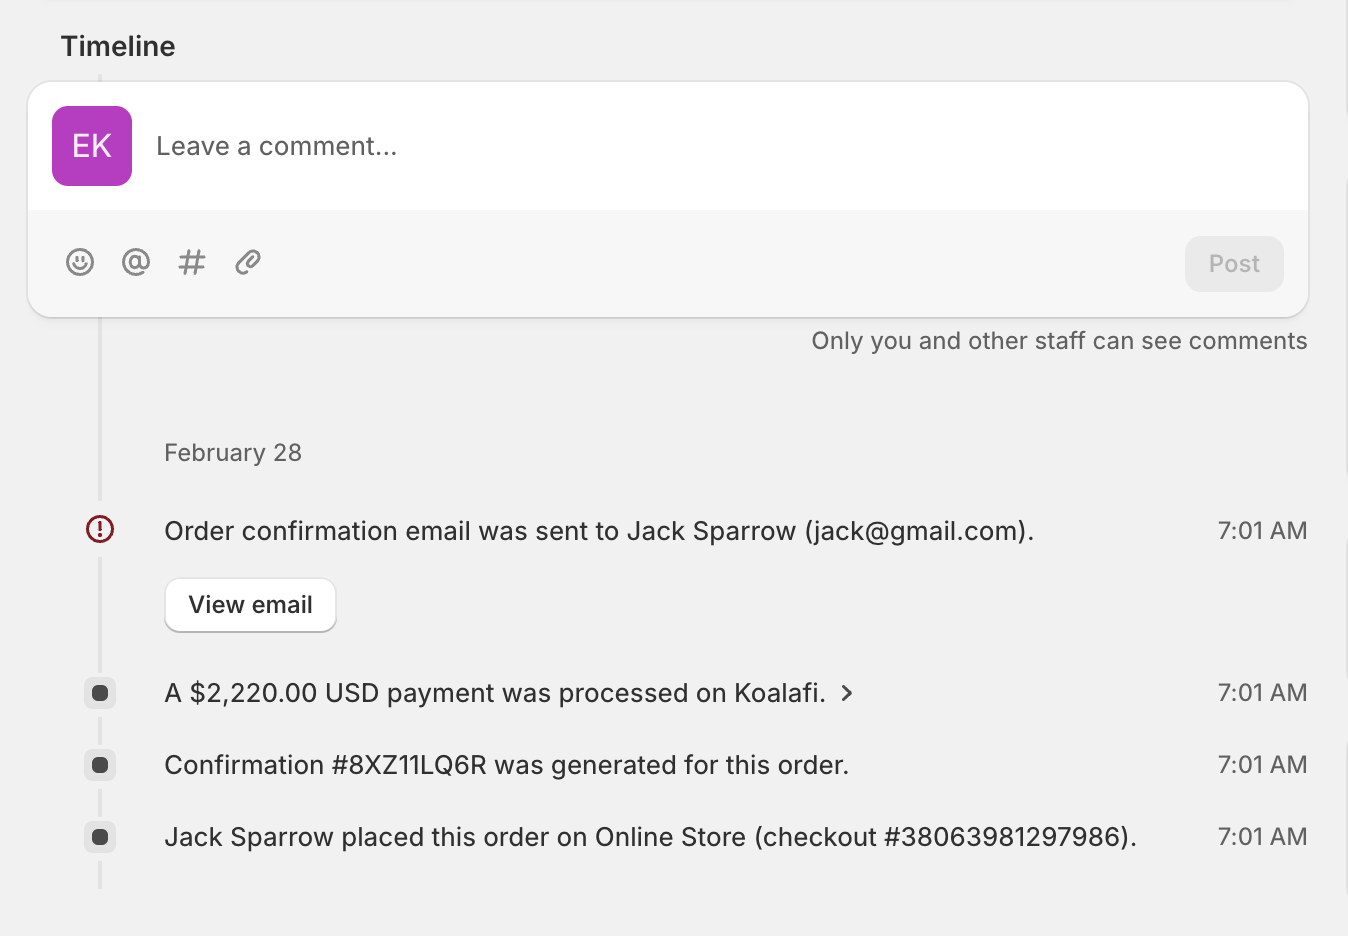
A charge is created after a consumer completes an order using Koalafi as a payment option. The charge will be in AUTHORIZED status initially. An entry with information about the charge will be added to the Timeline in the Order page of the store’s admin site. The entry title will say $XXX.XX was authorized on XXX, as shown below:
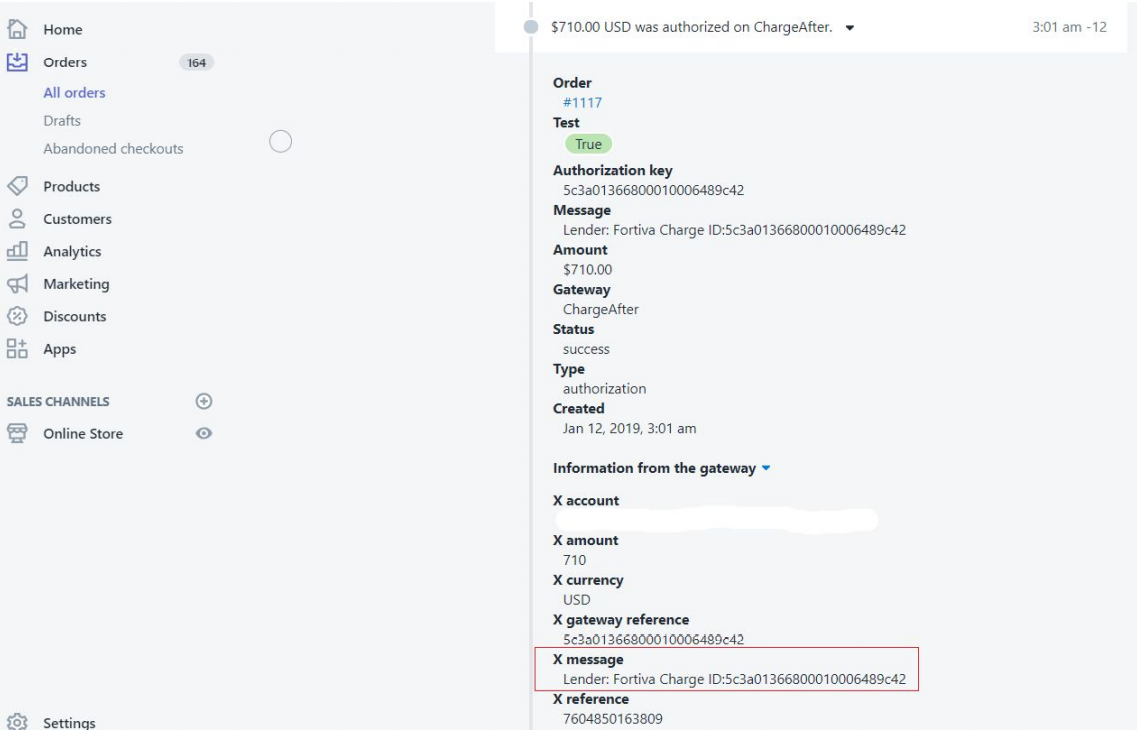
Click the entry title to expand the entry. Click again to expand the Information from the gateway. Under X message you can find the name of the Lender and the charge ID, as shown below
The following post-order transactions can be performed on a charge from your Shopify store’s admin site.
Settling a charge
A charge can only be settled (captured) once and in full.
Follow these steps to settle a charge:
- In the store’s admin site, go to the order’s page.
- Click Capture Payment. The Capture Payment dialog pops up. The amount on the text box is the charge total. For orders made through a lender that provided an open line of credit, the charge total will be equal to the order total. For lease-to-own orders, the charge total will exclude sales tax.
- Click Accept $XXX.XX
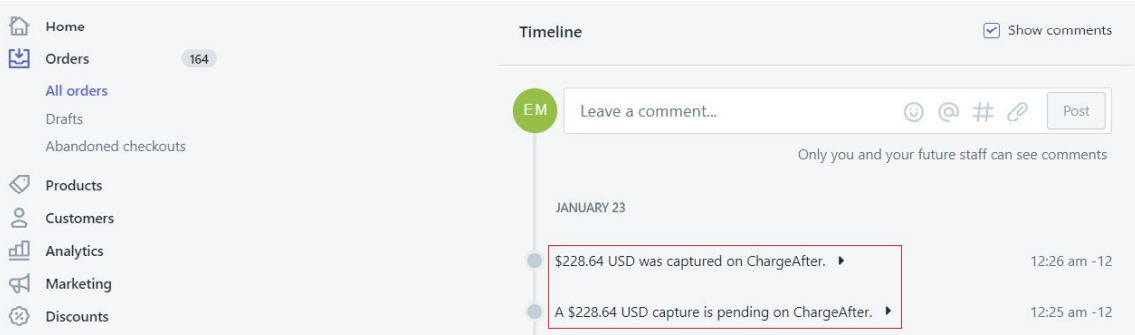
Two new entries will be recorded in the Order’s Timeline:
- The first entry will say A $XXX.XX USD capture is pending on Koalafi
- The second entry will say $XXX.XX USD was captured on Koalafi
Note that it may take several minutes for the second entry to be added to the timeline.
Once the two entries are added, the Timeline should look as follows:
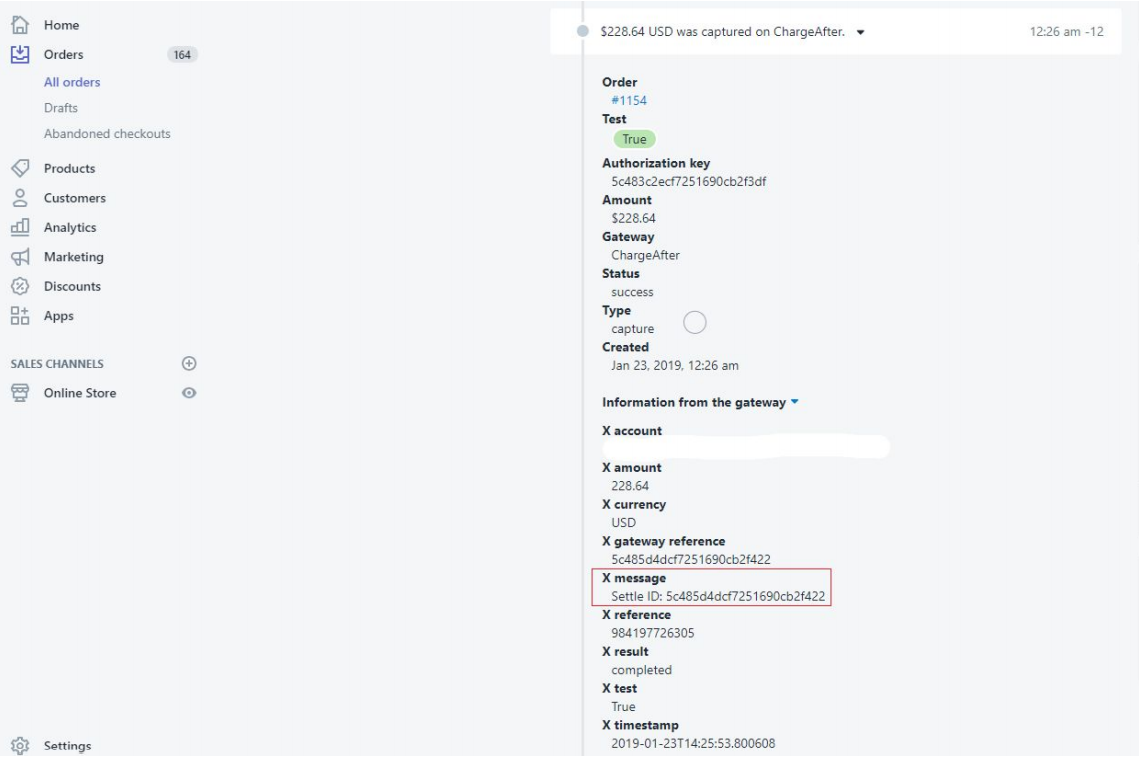
The settle transaction ID will appear in the second entry (the one on top). You can find it in the Information from the gateway under X message as shown below:
Refunding a charge
A charge can be refunded either partially or fully. Multiple partial refunds can be issued.
Follow these steps to refund a charge:
- In the store’s admin site, go to the order’s page
- At the top of the page click Refund items
- Select the items you wish to refund
- Under Refund shipping enter the shipping amount you wish to refund
- Go to the Summary section. The REFUND AMOUNT should be updated accordingly.
- Click Refund $XXX.XX
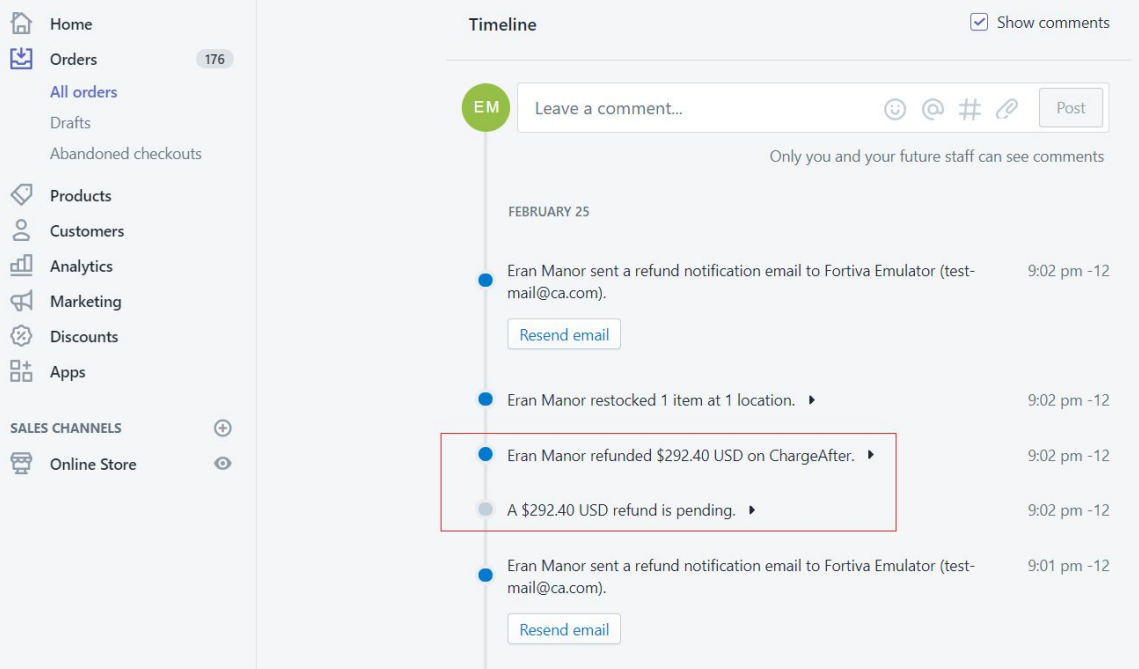
Two new entries will be recorded in the Order’s Timeline.
- The first entry will say A $XXX.XX USD refund is pending.
- The second entry will say You refunded $XXX.XX USD on ChargeAfter.
Note that it may take several minutes for the second entry to be added to the timeline.
Once the two entries are added, the Timeline should look as follows:
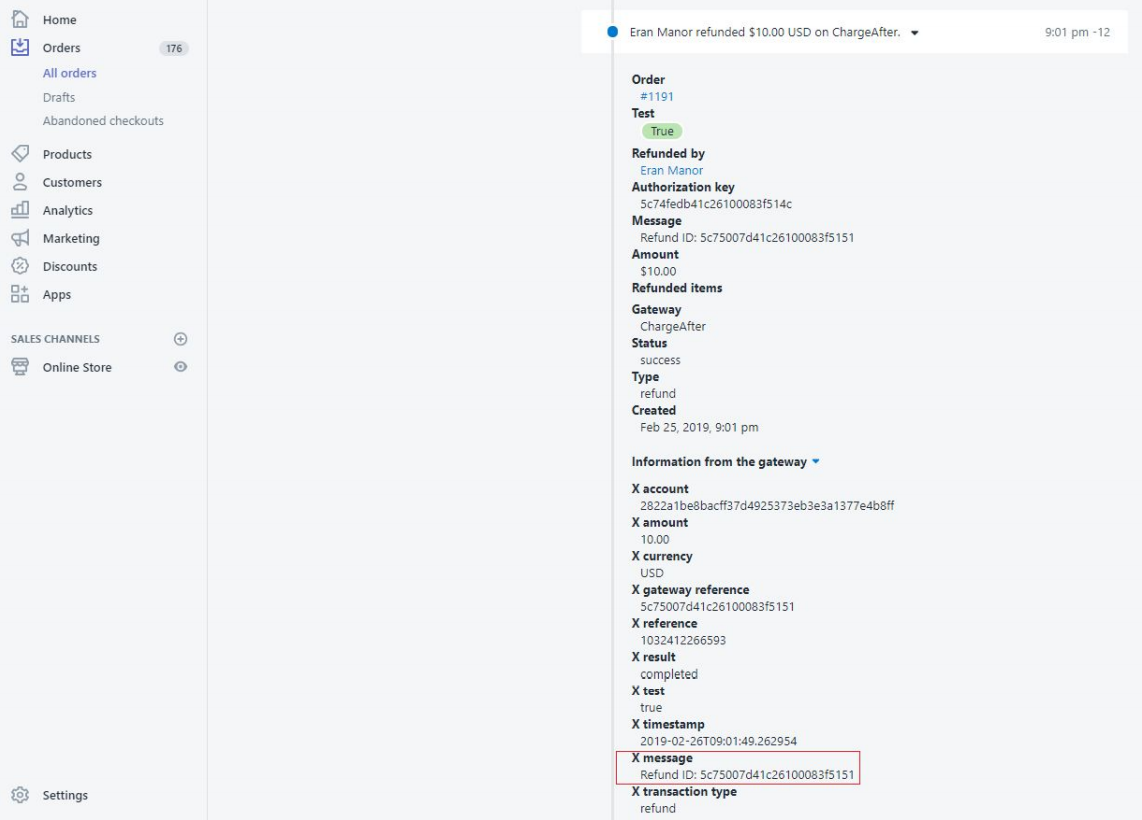
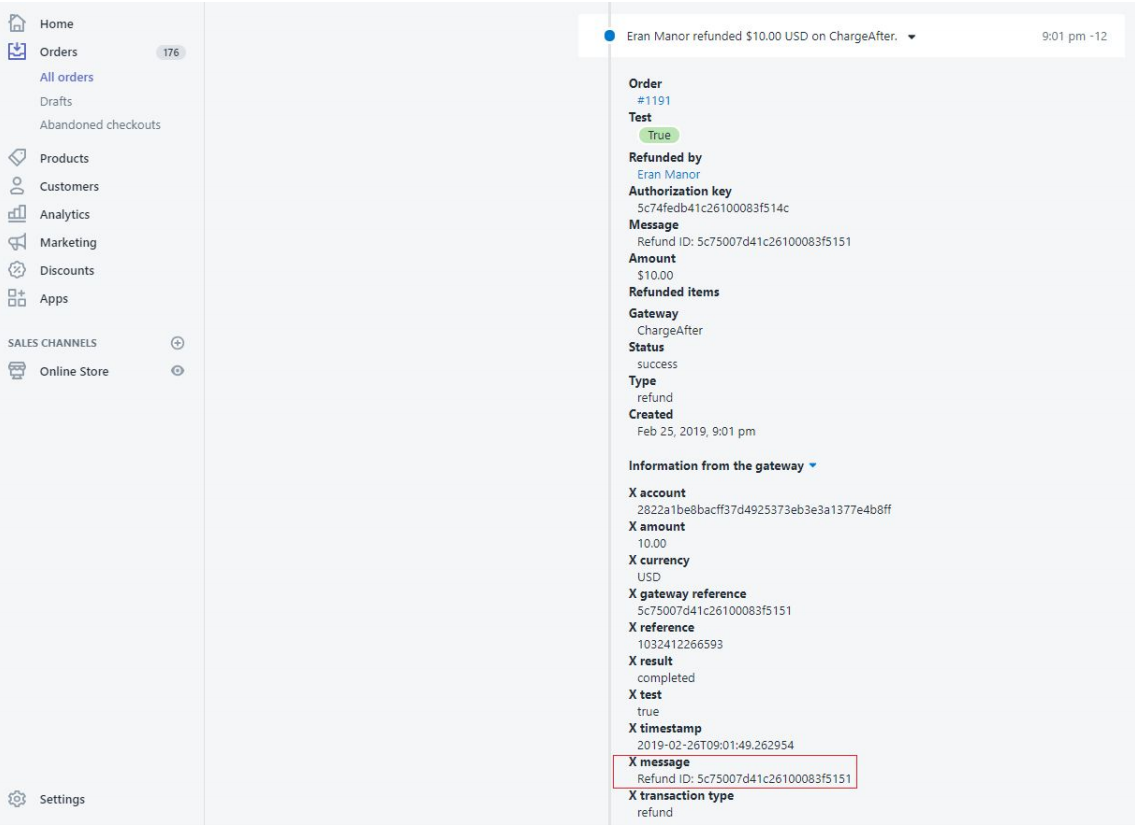
The refund transaction ID will appear in the second entry. You can find it in the Information from the gateway X Messages as shown below:
Voiding a charge
Cancelling an order that was placed through Koalafi has the effect of voiding a charge.
Follow these steps to void a charge:
- In the store’s admin site, go to the order’s page.
- At the top of the page click More actions and select Cancel order. The Cancel order dialog pops up. Please do not change the Shipping amount.
- Click Cancel order.
Two new entries will be recorded in the Order’s Timeline.
- The first entry will say Void of a $0.00 USD authorization is pending.
- The second entry will say You voided the authorization on Koalafi.
Note that it may take several minutes for the second entry to be added to the timeline.
Once the two entries are added, the Timeline should look as follows:

The refund transaction ID will appear in the second entry. You can find it in the Information from the gateway X Messages as shown below:
Troubleshooting
If you're running into errors during installation verify you have the following configurations set up correctly.
Missing SKU on products
If you are unable to launch Koalafi at checkout, verify that you have SKU numbers on your products. This is a required field to be compatible with the Koalafi Shopify app.